This site may earn a commission from merchant affiliate links, including eBay, Amazon, and others.

Rebuild GPR V1 Stabilizer

Joined Jan 2015
277 Posts | 157+
Winnipeg, Canada
GPR V1 Stabilizer, GPR Stabilizer

Hello,

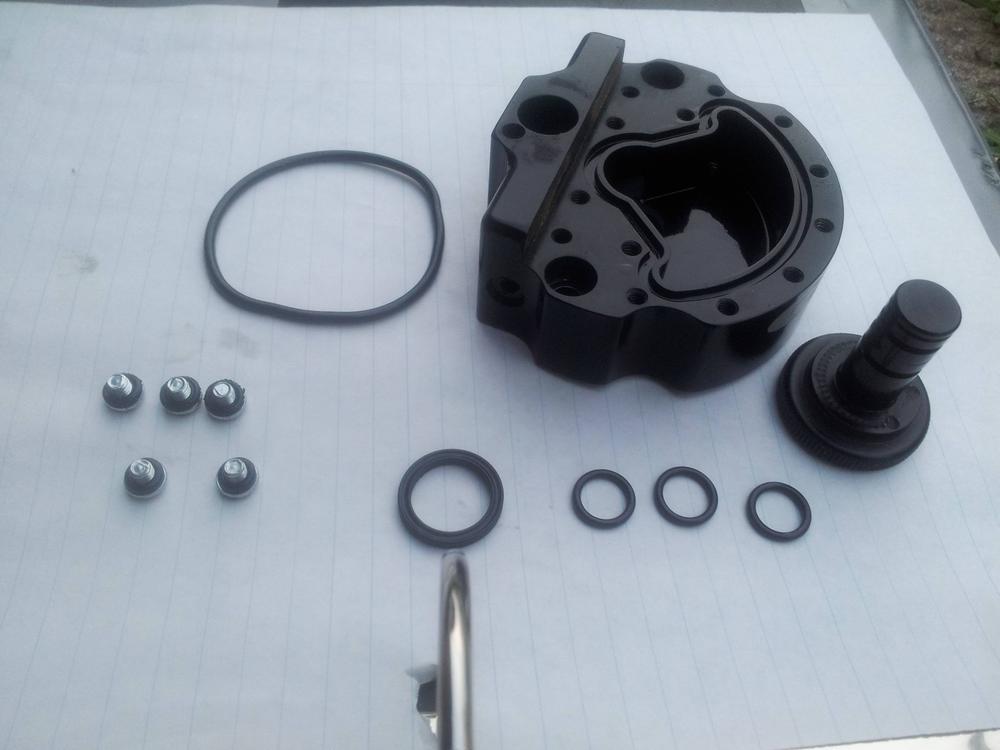
I have a V1 Stabilizer that I am rebuilding. In case anyone else has one and is going to rebuild it, this may help.

There are 10 o-rings in there. It's a very simple system actually. Just a plunger that pushes fork oil from one side to the other. As you turn the dial, the channel through which the oil flows decreases in size, creating more resistance.

O-rings:

x5 - McMaster-Carr - 1/16" 006 (1/8" ID)
x1 - McMaster-Carr - 3/32" 136 (2" ID)
x3 - McMaster-Carr - 1/16" 012 (3/8" ID)
x1 - McMaster-Carr - 114 x-profile (5/8" ID)


I forgot to photo the plunger (the side-to-side moving device that pushes the oil). It looks like a pinball machine flipper/plunger.
RNzByVt.jpg
 
Last edited:
  • Like
Reactions: 9 people
Haven't taken one apart let but you've given me the the push I need to take one apart when I need to and not S#%t my pants doing it. Thanks
 
OK, everything is done. All those o-rings were the correct size... but today when I cleaned the body of the stabilizer, I found another o-ring (one that I missed). Luckily it is a non-critical o-ring that basically acts as a pivot/bearing for the flipper/paddle.

I used 15wt oil on re-assembly. It seems like it might be too heavy, but haven't ridden yet to see.

I used a piece of garden hose 3" long and cut it off square on one end. I then opened one of the two screws to fill the unit with oil. Using the garden hose as a gravity-fed hopper, I pressed it flatly into the body to create a decent seal (to stop oil from leaking out of the bottom of the hose. I ensured that there were minimal bubbles left. A friend held the hose while I moved the arm back and forth to move the fluid around. Using the 3" high piece of hose achieved the same effect as if I would have fully submerged the unit in oil.

Before using the garden hose I used a funnel, but oil went everywhere and lots of air was permitted to enter the unit. The hose/tower idea is better.

Will report back after test ride.
 
  • Like
Reactions: 2 people
Yes, this is an option. The only benefit of this is that having the unit submerged ensures that all air bubbles escape (since no air can enter). Again, using a tube achieves the same effect since the fill hole is the only part that needs to be "submerged".

In the factory they simply push a bunch of fluid thru at once while moving the paddle. They waste a lot of oil but achieve a good result in less time.

https://youtu.be/aZ8jFAk0ofQ?t=1m55s

Someone told me that you should reassemble them while they are submerged in the oil.
 
Hi, what was this missed O-ring part No? Was there any retaining ring? If so what is size to order? Thanks.
 
Hello. Sorry, I have no recollection of the size of the "missing" (or more accurately, "overlooked") o-ring. Apologies. If memory serves me correctly, unless it is thrashed, there's zero need to replace the overlooked o-ring due to the fact that it is more of a bearing than a seal (the plunger rest on it).

As for size of hex head... probably SAE because it's 'murican built. If you don't have it, buy one set SAE hex, one set metric.

If Canada, almost every tool can be purchased in either SAE or metric, and if you buy a large kit of some tool, it comes half and half metric/SAE.
 
  • Like
Reactions: 1 person
Thanks for information and links. I will update some photos.
DSCF9003.jpg

All o-rings together:
DSCF9008.jpg

DSCF8988.jpg

"overlooked" o-ring is actually the same size as other one so :
x2 - McMaster-Carr - 114 x-profile (5/8" ID)

In my case it was not double-seal x-profile but regular one. I replace it with x-profile and it looks works also.
 

Register CTA

Register on Husaberg Forum! This sidebar will go away, and you will see fewer ads.

Recent Discussions