This site may earn a commission from merchant affiliate links, including eBay, Amazon, and others.

Husaberg 660

Joined May 2005
190 Posts | 145+
Sacramento California
I've been working on this project for some time now and am finally at the point where I feel it's time to start a thread to document the build.

My history with Husabergs dates back to...well...before there were Husabergs. I was a Husqvarna guy in the 80's. My first was an '83 CR 250. Then I had an '83 CR 500, but the standout Husky for me was the '87 TC510 that I bought used in 1988. I was hooked right away.

In 1996 my brother bought a 1995 Husaberg FE501. I was amazed at how much better that bike was than the old 510. The hook sank in even deeper.

I've accumulated a few other Husabergs over the years culminating in a 2008 FE550 I bought for the specific purpose of racing the 2011 Vegas to Reno desert race. The bike was so exceptional everywhere that we ended up getting 8th overall. Sadly, I was forced to sell that bike to fund the refurbishment of the bathroom in my old house. :mad:

Ever since then I've intended to build the ultimate Husaberg for myself. I wanted to start with something cheap because I was going to basically rebuild everything on the bike so, no sense breaking the bank right off the bat.

I found a 1996 FC600 that I ended up purchasing for $400. I've posted about this bike plenty in other threads but, to recap, it had fallen out of the previous owner's truck and tumbled down the highway so it was thoroughly beat.

Here's after spending a ton of time getting it at least worthy of a photo.
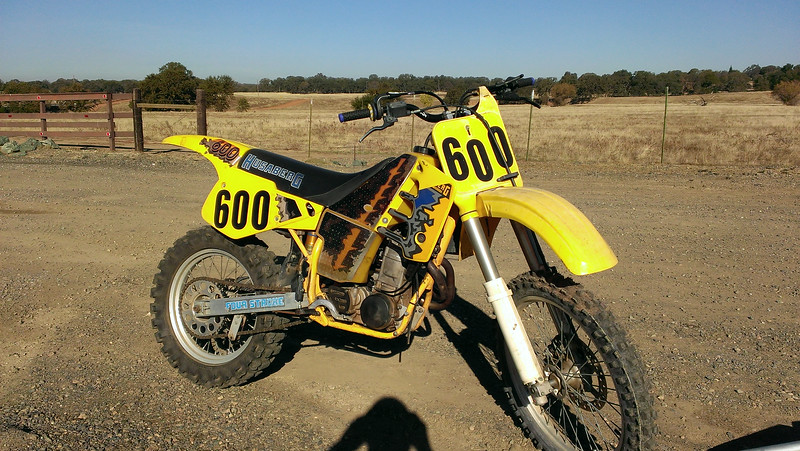
i-hkS5Pqj-L.jpg


Added a Keihin FCR41MX from a 2008 KTM 450SXF.
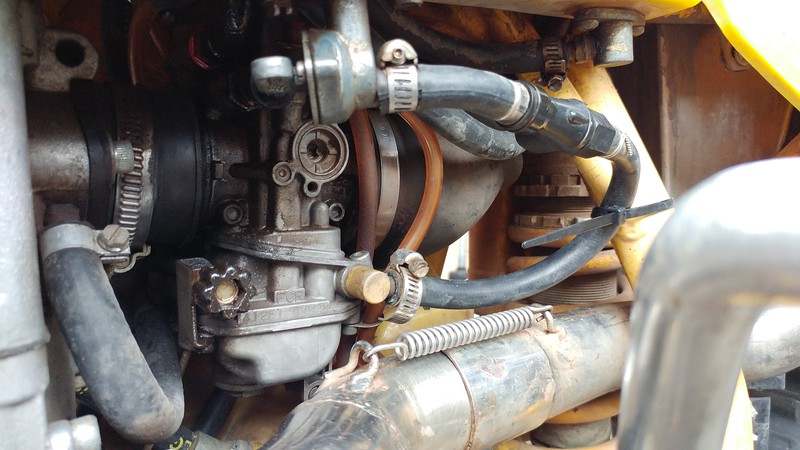
i-nFRqWQm-L.jpg


Swapped to 2013 KTM closed chamber forks and front brake with an Excel A60 laced to a KTM hub.
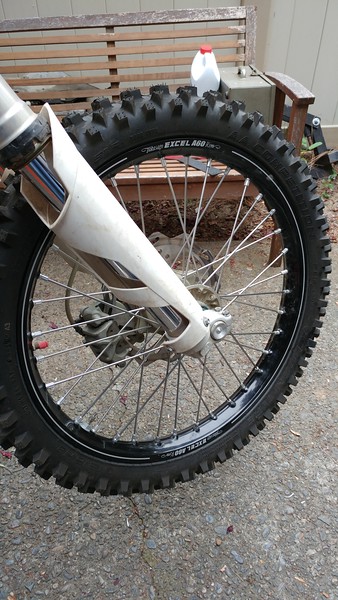
i-shTmcVb-L.jpg


Added an Eric's Machine aux tank I found on Ebay for a song and rigged up a pair of mounts for the stock fender flap.
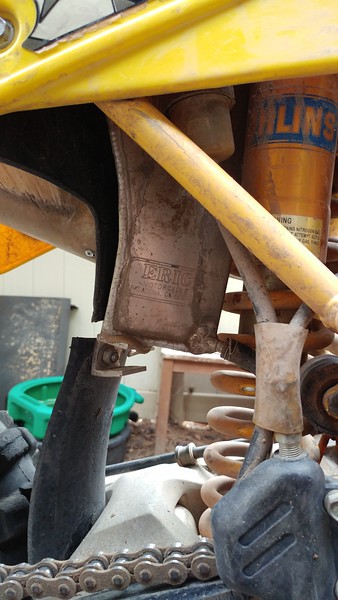
i-Spb7M32-L.jpg


Plumbed it to the stock tank via a quick disconnect and an inline valve.
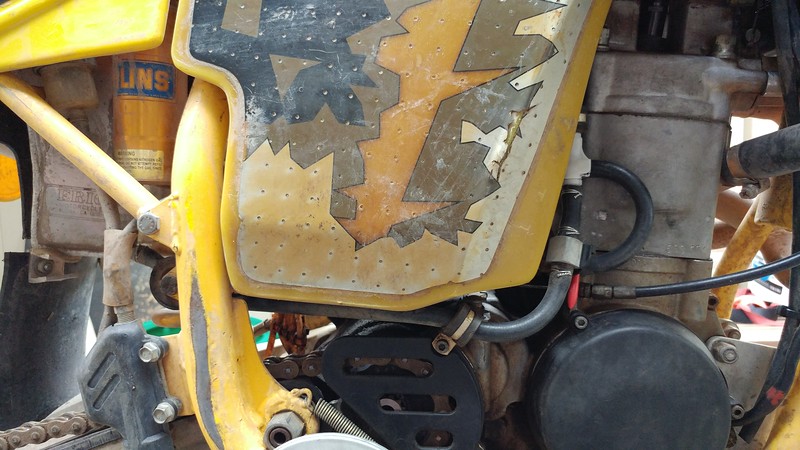
i-bNRpcXk-L.jpg


Then I installed Taffy's graphics and seat cover and here's where she's at today.
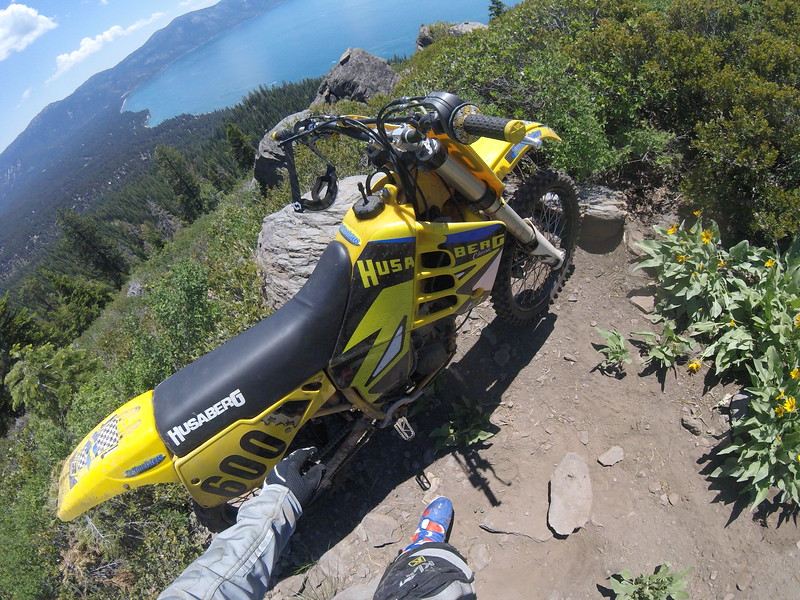
i-V8ShxwC-L.jpg


In addition to the cosmetic damage it had when I saved her, the engine was locked up. Since I was in the process of building my http://husaberg.org/mechanical/16703-husaberg-ktm-hybrid-engine.html I decided that here was my recipient for the engine.

I have a second FC600 engine that I bought off of a guy in Boise who planned to install it in a go-kart but lost enthusiasm for the project (presumably when he discovered how difficult it would be to start with no electric boot). I always intended to do something crazy with this engine so...Here it comes!
 
  • Like
Reactions: 10 people
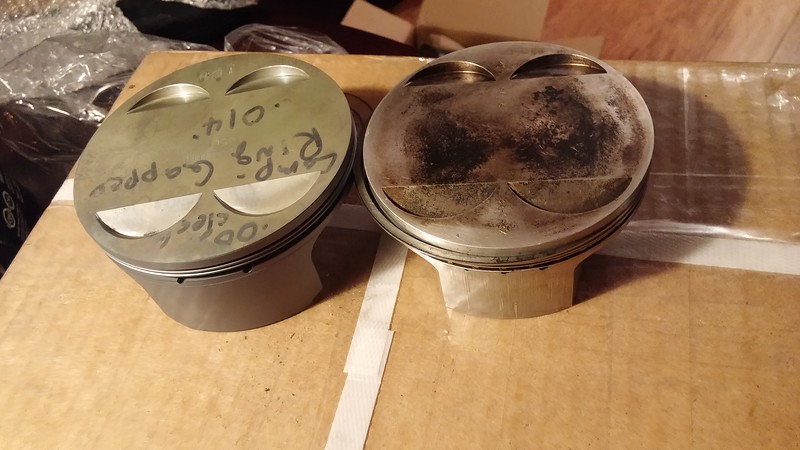
Stock 1996 600cc piston on the right at 95mm. Stock 550 piston from Wossner (P/N 8551DA) at 100mm. Combine that with the stock 84mm stroke found in the 600's and you get 659.73cc.

i-bL3382z-L.jpg


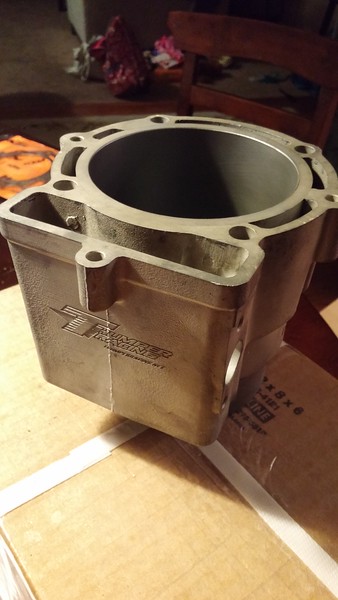
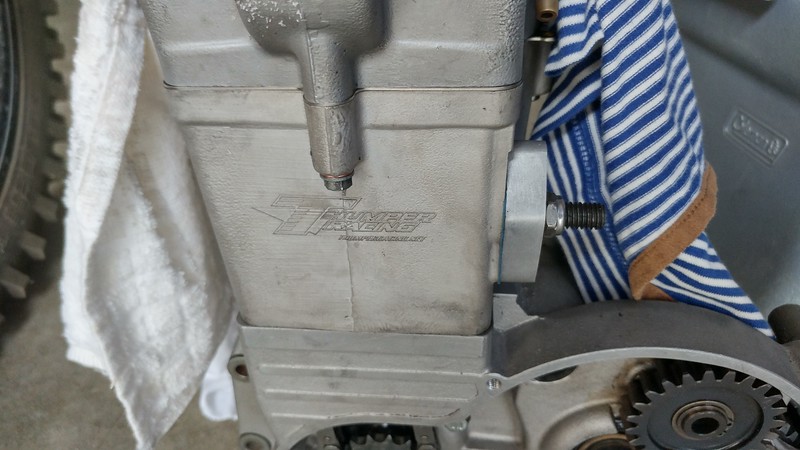
Cylinder bored and sleeved by Thumper Racing. The sleeve is cast iron. Not sure why Travis went that route over aluminum but...whatever.

i-8XnwVb2-L.jpg


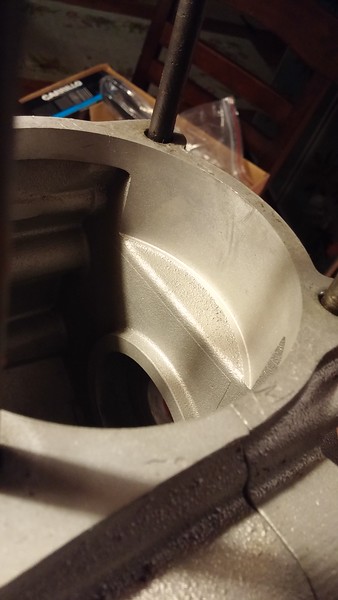
Cases bored to fit the sleeve.

i-2RdvgcM-L.jpg


You'll notice a bluish-grey coating most of the moving parts within this engine. That's the Microblue. Read about it here: Home Of MicroBlue Racing

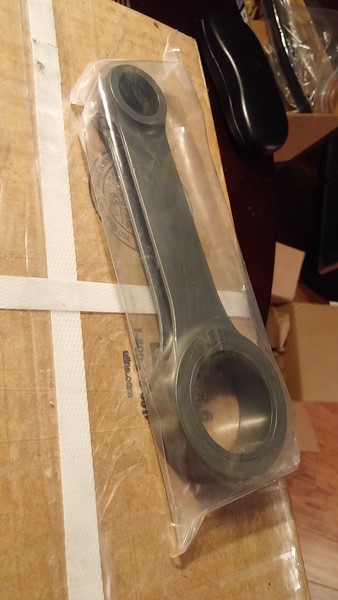
Here's the rebuildable Carrillo measuring the stock 130mm center-to-center.

i-d3rjPhr-L.jpg


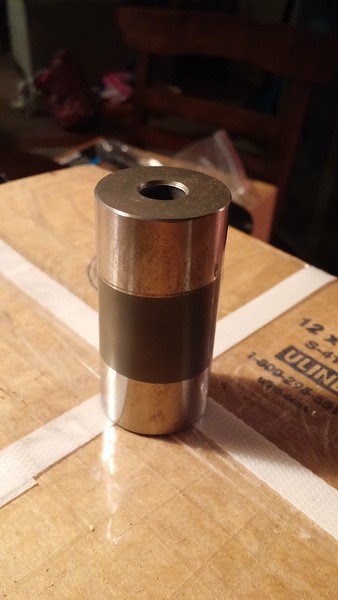
The rod pin showing a clearer example of the Microblue application in the center with the outers masked off where the crank webs get pressed on.

i-2mJDktM-L.jpg


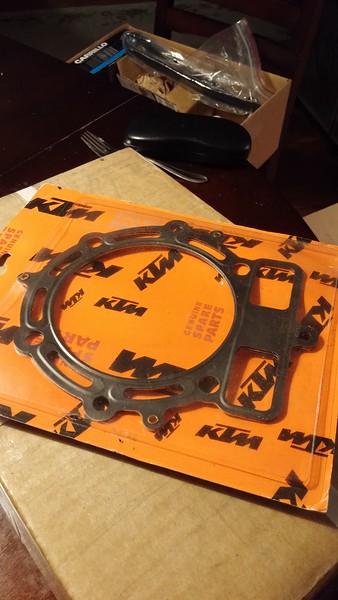
KTM 560 SMR head gasket for the 100mm bore.

i-QGdNwtC-L.jpg


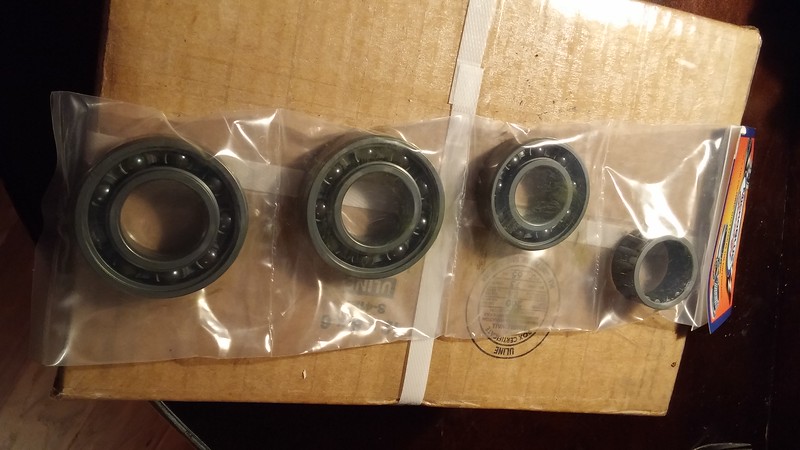
Microblue supplies their own line of bearings that are already treated. I went with the ceramic balls with steel races wherever possible.

i-dcHxStP-L.jpg


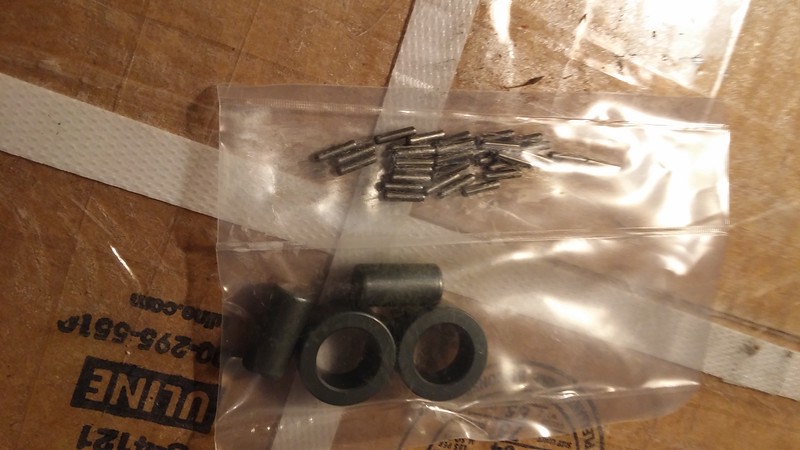
I also had Microblue treat the cam follower bearing races and needles as well as the rod bearing (seen in the previous photo).

i-3th9fLr-L.jpg


I have a titanium piston pin for this engine but apparently no pictures of it. It was a pin that Travis had for a KTM RFS engine but apparently never got used. To make matters worse (or "better" in my opinion because it indicates that progress is being made) I shipped the whole thing back to Thumper Racing earlier this week for final assembly and there will be no further opportunities for photos of internal engine components.

I decided to leave the final machining and assembly work to the experts. I've built a few engines but the sheer number that they deal with on a daily basis makes them far more experienced and I want to give this engine the best chance at longevity possible.

But here's the best part. A phone conversation with Travis on Wednesday had me giddy in a work meeting I attended just after. My co-workers must think I'm a nut. Anyway, Thumper Racing will install the new rod, balance the rotating assembly, assemble the bottom end, Machine the valve pockets for 38mm inlets and 33mm exhausts, port the head to make use of those big valves, machine the combustion chamber for 13.5:1 compression (since I'm committed to using race gas exclusively in this engine), and then final assemble everything from the cases inwards as well as the top end.

Since I like a more responsive engine at the potential cost of occasional stalling, I asked Travis if he would concentrate on weight removal from the heavy end of the crank when balancing. The added benefit here being that a lighter crank is, presumably, easier on main bearings.

Future work will involve boring the carb but I'm going to hold off on that so I can afford to buy Christmas gifts. No sense getting THAT LOOK from the wife when there's nothing for our little one under the ol' X-mas tree.

Stay tuned for updates...
 
  • Like
Reactions: 9 people
Hi Thorgan,
you're doing a great project. Keep us up to date with posts and pics.

I also read about your coating at MicroBlue® The How It Works as you recommended. I could not find any detailed information about it - not on their homepage or anywhere else on the internet. What is it exactly and how does it work?
Sorry to mention that, but in the first place it sounds like snake oil to me...
 
Sorry that I stress this topic again,
I'm just curious about the coating stuff in general. Lower friction causes less wear and less thermal stress to all components in the drivetrain - of course - that makes sense.

Renown companies like Oerlikon Balzer offer thin film coatings (usually PVD processes) for tooling and drive train applications. For engines they provide something called Diamond-Like-Carbon (DLC). In that case Balinit Calidur. They advertise it with applications in NASCAR, Formula 1, etc. They point is:
  1. The stuff looks like black color coated - not blue.
  2. They give detailed information about material and coating hardness, etc. So you can compare it with other coatings.
Overview: https://www.oerlikon.com/balzers/com/de/oerlikon-balzers-beschichtungsleitfaden/?structure_id=9384
Balinit Calidur: https://www.oerlikon.com/balzers/com/de/portfolio/balzers-oberflaechenloesungen/pvd-und-pacvd-basierte-beschichtungen/balinit/kohlenstoff-dlc-basierte/balinit-verschleissschutz-durch-duennfilmbeschichtung-cavidur/?structure_id=9384

Then there is the research guys trying to market their stuff, like Fraunhofer with its Diamor, which is a DLC as well, but with little differences. They actually use graphite and implement it in the material surface that a diamond like strong structure can be made (I didn't read the details... sorry). Anyway. Same story: Material and specs are published somehow.

Since I don't know any company that will coat my gears with one of those magic things - I'm wondering what actually MicroBlue is doing/using.

Super-smooth-polished surfaces = low friction. Does the coating level out the left over microstructures? As far as I got it at MicroBlue's website - The superfinished surface comes before you coat it!?!

I also found offers like that: Lower Friction. They offer a powder for coating: "The powder can be coated by spraying (at 120 psi) the substrate with dry (& cool) pneumatic air. It does not require any binders and spraying can be done at normal room temperature. Coated film will be 0.5 micron thick. In an alternative application method, the powder can also be mixed with Isopropyl alcohol and this paste could be buffed to the substrate. The coating applications are already established in many areas such as Automotive parts, Racing Car Engine and other parts, Aerospace parts, Bearings (Linear, Ball, Roller etc), Shafts,..." To me actually I don't know what that is - sounds like snake oil - I guess I prefer to not have that in my engine...

What does it cost me if I also want my engine coated (with MicroBlue) and what's the value in return and can I trust the product?

Sorry thorgan - I didn't want to make you feel uncomfortable with your achievements - I just want to figure out what I'll get for my money. At the end of the day I need to pay a hell amount of money for shipment and coating...

Regards,
EDE
 
  • Like
Reactions: 1 person
EDE,
I've been keeping a spreadsheet on all the costs of the project and the Superfinish/Microblue part of it was $220.

Unlike a coating such as DLC which makes a surface harder and more slippery so less damage is done when surface contact happens, Microblue attempts to avoid the surface contact from happening at all. It's "hydrophyllic" to oil ("oilphyllic"?). From what I understand, it tends to hold oil in the treated area. How it does this is completely beyond me. To be honest, I'm treating this as a big, expensive experiment because, if Microblue performs as advertised, then my engine should not see the typical early Husaberg failures (cam follower bearings and rod bearings in my experience) that have been so common. When I mentioned to Craig (the owner of Microblue) that this engine has no oil pump and is splash lubricated only, he was "very unconcerned".

Indicentally, I also had the rod bearings, main bearings, pistons, wristpins, and piston rings for my Cummins 5.9L turbo diesel treated with Microblue as well. It's at about a 10 percent increase in fuel efficiency so far. It's not completely broken in yet so I'm hoping to see further improvements. It's difficult to say if this improvement is due to the Microblue, however, because I am also running a different camshaft which is advertised to increase fuel economy as well. At least there have been no detrimental effects so far.

As far as specifics of the coating, I wouldn't expect Craig to give you all of the details but maybe it's worth a call at least. He's a nice guy and very knowledgeable.
 
  • Like
Reactions: 3 people
(Sincere thanks for for the topical and informative discussion. I find the 'thanks' button insufficient.)
 
Thanks thorgan,
it would be great if this helps to prevent typical early Husaberg failures. Keep us up to date!
 
Update alert!
I received a call from Travis about a week ago (and chose not to update this thread until just now out of sheer laziness). He has been extremely busy and, to make matters worse, his chief machinist has given notice that he's moving on. His workload makes a lot of sense as, even on little ol' Husaberg.org, I see a lot of guys sending business off to Thumper Racing. That's not to say that there's no progress. I originally asked him to balance the crank by means of weight removal only and it sounds as though he's accomplished that...and then some. Travis mentioned that he was able to remove 12 oz (340 grams) from the crank and that should be a noticeable improvement to the responsiveness of the engine.

I was thrilled to hear this news.

Next on the list of to-do's for this engine are assemble the cases, machine the head for larger valves, massage the combustion chamber for 13.5:1 compression ratio, port the intake and exhaust runners, and probably plenty of things that I've left out.

As mentioned before, I've decided to hold off on machining out the carb venturi for financial reasons. Looking to early spring for this to happen.

So there's the update on the Husaberg 660 project.
 
  • Like
Reactions: 3 people
Yeah, if it seems like things are going slow, this is why. They're absolutely swamped.
 
Another update:
Piston - Apparently I did a poor job of measuring parts when I took the engine apart. Once assembled on the rod, the piston I selected was 2mm below the deck according to Travis. We've switched to using a KTM 560 SMR piston from Wossner. Having it sent out for Microblue.

Custom rod - Upon fitup, Travis discovered that the rod was contacting the cases. He had to do some trenching.

Carb - I got a Christmas bonus at work so I've decided to pull the trigger on boring the carb out.

Cam sprocket - We decided to switch to the steel cam sprocket that Bushie supplied the part number for in my hybrid engine thread.

Progress - As it stands right now, the bottom end is together, the head work is complete, the carb work is complete and all Travis is waiting for is the cam sprocket to arrive and the piston to come back from Microblue.

Jetting - Travis's website mentions that the carb overbore comes with custom jetting so I'm hoping this'll get me in the ballpark. I do feel that it's necessary to mention, as an indication of how cool Travis and the folks at Thumper Racing are, that he offered to weld up a sensor bung on my exhaust and provide a wideband to help get it dialed in so long as I decide to do the break-in near his shop. And, since his shop is near some of the best motorcycling in Nevada, I think that I'll take him up on it.

Pictures to come once I get the engine back.
 
  • Like
Reactions: 7 people
I just received an email from Travis saying that the engine's done. We're going to talk on Monday to square up the finances. That gives me the weekend to find a buyer for my spare kidney as I expect this to be expensive.
 
I can't wait to read your ride review/report. I'm also collecting funds for Travis to do his magic to turn my blown 650 into a jewel 700. I estimated 10K Canadian. So far got only 4
 
I can't even imagine what a Husaberg 700 must be like.
Sitting at home recovering from a cold and keeping an eye on my vomiting 6-year-old. It's killing me that I can't work on the bike. At least the old engine is out.

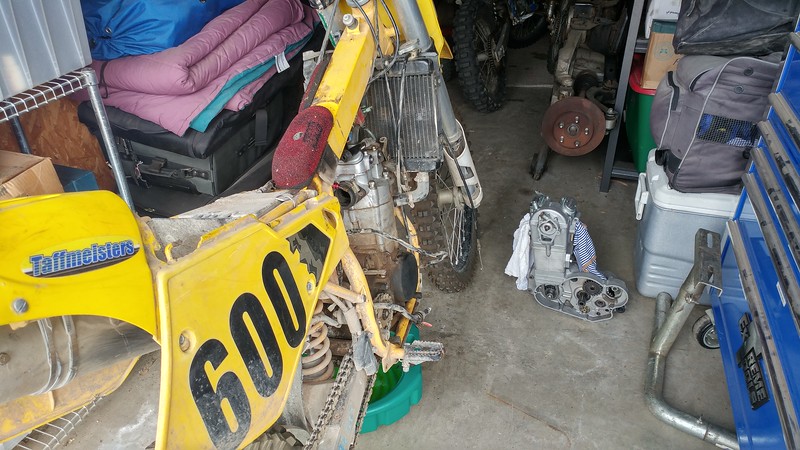
Working on replacing the swingarm bearings before getting the 660 in place.

A few pics (with the old and dirty not quite out yet...but I assure you that it is now).

By the way, can anyone give me some advice on the procedure to adjust a manual cam chain tensioner? Travis installed one (presumably from an RFS engine) and I imagine it'll need some fussing in the not so distant future.

i-FrXK9hG-L.jpg


i-rzTg3vX-L.jpg
 
  • Like
Reactions: 3 people
Well...the engine is in now. There's been a bunch of drama with a wet stator conversion that Thumper Racing urged me to do and both exhaust header bolt holes ended up getting stripped out when I went to torque everything up.

I did some of the heat cycles recommed by TR in the few hours that I had available last week and I can report great results. With the weight reduction from balancing the crank, the engine has definitely gotten more responsive. It didn't really lose any part throttle bottom end or mid range despite the larger valves and head porting. I can't talk to the top end and full throttle yet as I'm trying to adhere myself to the TR break-in recommendations that advise working your way up to 100% pace (full throttle riding) slowly in 10 minute sessions with 30 minute cool-downs in between. I was hoping to get there while riding at the Hangtown motocross track on Sunday but she up and quit!!!!

I was coming into a choppy right-hander with lots of braking bumps and the engine suddenly lost power. It didn't lock up and exhibited plenty of compression when trying to restart it so I'm doubtful anything went wrong inside the engine. My guess is fuel or ignition. Going to tear her apart tomorrow and check my stator connections as the spade connectors I used on the wire ends left a lot to be desired. Hoping that one of them has come loose. The other thing I'm going to check is the needle in the carb. I've had the needle clip come off in a Keihin FCR before which resulted in the needle dropping down into the needle jet. She would give me a "thump" every now and then while kicking so, whatever the cause is, it's potentially intermittent.

Wish me luck.
 
  • Like
Reactions: 2 people
I looked into it a bit more today and everything seems to be in order. I pulled the spark plug and the jetting appears to be a smidgen on the rich side of spot on if the plug color is to be believed. What I'm really happy about is that I don't see any aluminum stuck to the plug. That's a relief!

The needle clip is still in position so no problem there.

It's at this point that I ran out of time and had to go to work where I'll probably spend all evening distracted by thoughts of what else could have gone wrong.

The sad part is that I have too many projects and won't be able to get back to this one until Sunday.

I promise, when this is all sorted out, I'll post a video of it running. In the meantime, Here's a video from last summer. Same bike but with the old paintshaker FC600 engine that I just removed.

https://photos.smugmug.com/photos/i-rvQBd5f/0/258ff802/1280/i-rvQBd5f-1280.mp4
 
  • Like
Reactions: 2 people
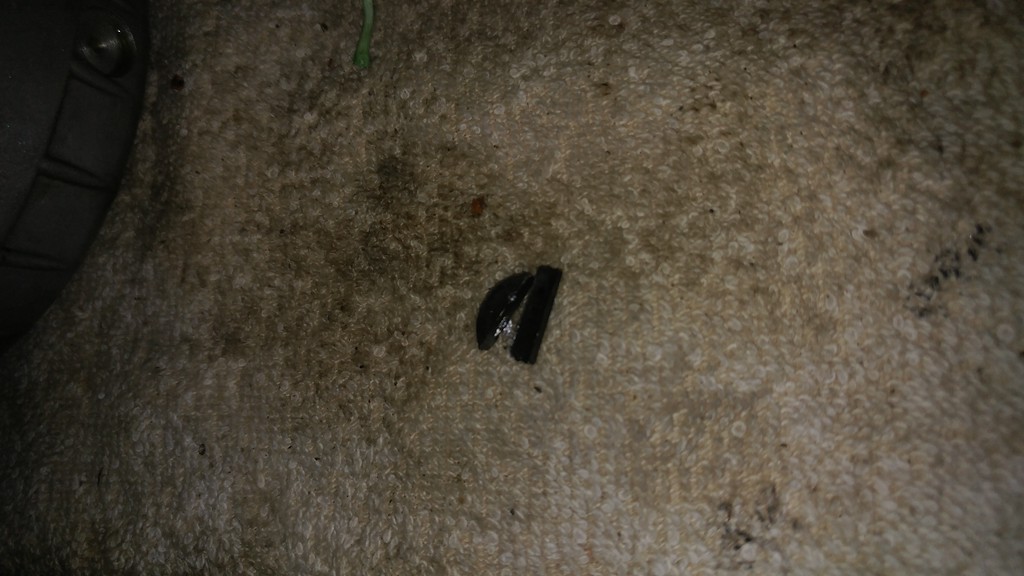
Hmm...what have we here?! The woodruff key for the flywheel isn't supposed to be 2-piece!

i-RP3FMDM-XL.jpg


That would explain why I was getting spark only once in a while.
 
  • Like
Reactions: 2 people

Register CTA

Register on Husaberg Forum! This sidebar will go away, and you will see fewer ads.

Recent Discussions