Correct way to install water pump seal and o-ring

Husaberg

Help Support Husaberg:

This site may earn a commission from merchant affiliate links, including eBay, Amazon, and others.
Joined
Mar 26, 2006
Messages
4
Location
England
Correct way to install water pump seal

Hi everyone,

I recently purchased a husaberg fe400e 2002 model.

there's a bit of a water leak coming from the wheep hole.
The guy before me had done a lot of work to the bike and had actually put a new water pump seal and in, after reading quite a few threads on here I'm a bit confused as to whether hes fit it correctly or if it needs to be the other way around, also is the rubber seal supposed to sit flush on the casing or be sunken in, it was sat a little bit skuwif but when I tried push one side in it just all push in... *♂️
any information would be really greatly appreciated!

I've attached a picture to show whatnot currently looks like, can somebody please tell me what I need to buy and do to make it right?

Thanks,

Ash.
 

Attachments

  • 20200425_201134.jpg
    20200425_201134.jpg
    12.6 KB
Last edited:
Hi Ash

from mwhat I can see in this very pooor photo, you have the spring side towards the camers = which is correct.

however, that seal doesn't appear to be Brown and only the OEM metal-backed seal works.

just press it in with a vice and something flat. don't tap it in as they tend to fold in half like a conch.

cheers

Taffy
 
Thank you taffy,

At the minute the seal is pressed into the hole, should this sit flush on the casing?

also if this seal isn't sufficient are you able to send me a price for the correct part please?

And apologies for the rubbish picture my camera is terrible I can take a clearer one this afternoon...
Many Thanks,

Ash.
 
well if it's a standard soft rubber seal it's ****. no good at all, that is why it is at the bottom of the hole because it FELL in.

they are 100100 on my webshop. £6.06 to a leper...

cheers

Taffy
 
On first years crf 450 a cavitation phenomenon caused the water pump seal to break. A simple modification eliminates the frequent breakages of this seal. It is important that the impeller shaft shows no signs of wear.
 

Attachments

  • WaterPumpreplacement032.jpg
    WaterPumpreplacement032.jpg
    82.6 KB
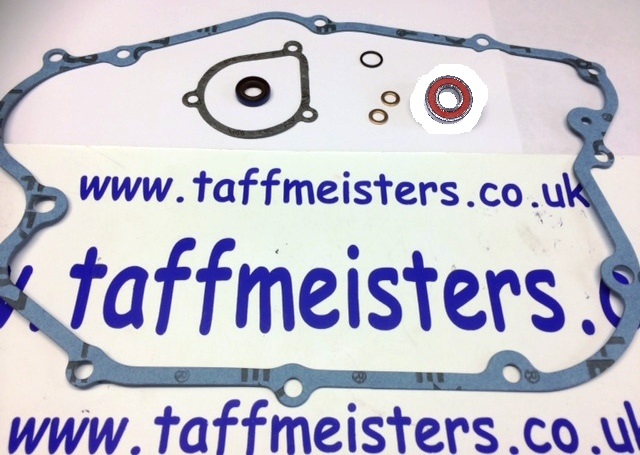
Taffy's kit has just about everything you could need.

Taffmeisters Water Pump Repair Kit 2001-2003

water%20pump%20leak%2001-03.JPG


Its an excellent value.

I would take it apart first as you may break the impeller when you take it off. It gets brittle over time and stuck on. A new circlip that holds the impeller on is always a good idea. It tends to rust and loosen a bit every time you take it off. Also there is a very large O-ring that sits in the case that gets smashed down. You can easily match that up from a O-Ring assortment.

Purchase extra WP seals as you may go through a few before you get it right. It is a very very tight interference fit. I put the seal in the freezer overnight and then heat the case with a heat gun (or hair dryer if you don't have one. Press the seal in, don't bash it in with a socket and hammer. If you can't figure a way to press it in an independent auto mechanic in your neighborhood would probably do it for a six pack of craft beer.

When putting the side cover back on liberally coat the WP shaft and kick start shaft with grease. Husaberg sells a plastic cover for the WP shaft so that you don't nik the seal upon installation. You can also use a little thin tape around the shaft. Take you time and lay the bike on its side during removal and installation.

Coat the side cover gasket with a very light coat of grease so that it can be reused a few times.

When removing the side cover tap the kickstart shaft lightly with a plastic hammer to keep the kickstart assembly from popping out (one less thing you will have to deal with).

Keep in mind that more damage is probably done to the WP seal during installation of the side cover than actual wear and tear so it may be worth it to purchase the plastic mounting sleeve if you are going to keep this bike for awhile.
 
Last edited:
Thanks Guys, Taffy's sorted me out with what I needed, the advice from everybody has been fantastic.

I've managed to get the ****** old seal out carefully without removing the full side cover and am hoping that I may be able to carefully insert the new seal the same way, along with a new circlip and water pump gasket.

if this doesn't work I'll be sure to refer back to the extremely detailed and brilliant advice from you Husabutt


you've all been fantastic help!

thanks,

Ash.
 
couple of things here.
thanks Eric, nice support there, how I remember this place used to be all the time with DL at the head of it all. I didn't realise the 'fat' waterjacket O ring wasn't in the photos! But we do supply it anyway...

Swinny
that's two people who have now told you to press the seal in the cover yet you are leaving the cover on the engine. it's at times like this I need one of those popcorn-eating-emojis!!!

regards

Taffy
 
On first years crf 450 a cavitation phenomenon caused the water pump seal to break. A simple modification eliminates the frequent breakages of this seal. It is important that the impeller shaft shows no signs of wear.

so what is the modification Alfy?

Taffy
 
couple of things here.
thanks Eric, nice support there, how I remember this place used to be all the time with DL at the head of it all. I didn't realise the 'fat' waterjacket O ring wasn't in the photos! But we do supply it anyway...

Swinny
that's two people who have now told you to press the seal in the cover yet you are leaving the cover on the engine. it's at times like this I need one of those popcorn-eating-emojis!!!

regards

Taffy

When i look at the diagram i can't see an o ring that sits inside the water pump casing, unless you mean the one inside the engine casing at the top, part 20?

I know you think I'm been daft for trying to push the seal in without removing the case but I'm just a bit concerned from reading on here how some people have had a big struggle trying to get it back on correctly.

On the plus side for you taffy, if it doesn't work and I bust the new seal... I'll have to order another one off you, then I'll take the whole casing off, and buy a press to put it in with.

Thanks guys.
 

Attachments

  • Screenshot_20200427-100942_Drive.jpg
    Screenshot_20200427-100942_Drive.jpg
    77.1 KB
it's in the 2003 manual. they left it off ithe manual in 2002. a mistake

Taffy
 
I believe that #20 in your diagram is the O-ring that tends to fall out of the engine case when you remove the side cover. The parts manual says its 17mm O.D. so that seems about right.

To find the O-ring that sits right behind the water pump impeller, that should be replaced when freshening up the WP seal, you need to look at the " Driving Shaft Counter Balancer" in the parts manual because the water pump shaft is first and foremost the counter balancer shaft. They are one and the same. That is a 10mm x 1.3mm O-ring.

I would strongly recommend that you remove the side cover and at least replace the O-ring (on the balancer shaft ) (its a hard to find size that will not be found in a universal O-ring assortment), the 17mm O-ring in the case, the water pump bearing / oil seal and then the water pump seal.

The water pump seal is such a tight fit that you are going to surely damage the seal if you try to bash it in without taking the side cover off. The lip of the seal is very fragile and it is difficult to keep the seal from being cocked from one side or the other when bashing it in. It will catch on a grove in the shaft and nick the seal lip.

Other than changing a spark plug and engine oil this is probably the most important maintenance item on a Husaberg. Do it right the first time and you will have a leak free weep hole. The weep hole can also leak oil that's why you should also replace the bearing/oil seal and O-ring.
 

Register CTA

Register on Husaberg Forum! This sidebar will go away, and you will see fewer ads.

Recent Discussions

Recent Discussions

Back
Top